Wednesday 1 July 2015

Riddle and Finn, Brighton.

In addition to being coeliac I have some other food allergies which make eating out a bit of a pain, and catering for me bit of a nightmare.  So the pleasure I take in writing this review might be a bit understated.  I have an anaphalactic reaction to most nightshade foods.  This family of foods includes potato, tomato, vegetable peppers (the fresh red, green and yellow ones), chilli, paprika and aubergine as well as more obscure ingredients such as nicotine, physallis and goji berries.  Anaphalaxis (in my case) is that one which makes your throat swell up and stops you breathing so an incident could be catastrophic (if this sounds like you or someone you know, there is a useful article on Foods Matter's site here).


I pitched up with a friend to Riddle and Finns in Meeting House Street in the Lanes in Brighton having spotted and admired their beach outpost earlier in the day.  One of my favourite deli clients used to have the shop next door but I don't recall ever noticing Riddle and Finns. I would definitely had been drawn in if I had, perhaps the cases of biscuits and brownies were stacked too high for me to see over.  

I never hold out any great expectations if I eat at a restaurant without pre-booking as I am well aware that my allergies make me a pain in the arse for the majority of chefs and establishments.  Riddle and Finn definitely buck the trend.  Advertising themselves as a champagne and oyster bar, the restaurant menu covers a comprehensive range of fish and seafood, with light bites such as whitebait and oysters, seafood platters and main courses.  There are 3 vegetarian main courses on this current menu and a couple of those looked to be gluten free (I didn't check this).  The decor and menu reminded me of Randall & Aubin at Brewer St in Soho, though I found it a lot easier to order and eat safely at Riddle and Finn.   

I owe a debt of gratitude to the best waiting staff you can possibly imagine - and complete shame on my part for not having got the dark haired guy's name who served us with such care and intelligence.  But across all the staff we encountered, no one in a restaurant has ever gone out of their way to make a meal more safe for me.  

We arrived on day one of a new menu so the staff were not completely familiar with all the ingredients but they did an amazing job.  No gluten free bread?  (my bad, i usually bring my own), but it's ok, we'll make you blinis with buckwheat flour.  They took a list of my allergies and reported back to the kitchen, bringing me back a clearly amended menu listing the available options for me.   

In the meantime, we had been served bread / blinis, mackerel pate, chilli mayo and horseradish (a nice touch for a cover charge of £1/head), along with a decent though slightly sweet (my bad choice) Rose from the wine list.  Alerted to the ingredients in the dips, I was more than happy with blinis and butter.

The room is white-tiled floor to ceiling with high marble slab tables.  We were sat on comfy bar stools at a table seating 8,  just wide enough to allow some privacy with your companion seated next to you.   Looking round at the other customers, most seemed to be opting for oysters or the large platters of fruit de mer, which looked delicious.  I was very tempted by the razor clams on the small bites menu, but am saving that for my next visit.


We watched unabashed as our neighbours opposite on the shared table devoured and slurped their way through huge and amazing looking wok-fried crabs with unreserved enjoyment.  Half a dozen of the sweetest (hence the bad wine choice), plump fresh oysters arrived, and disappeared almost as quickly.  It was only once we had eaten them I realised that I should have been taking pictures, hence the photo of the empty shells.

I ordered the pan-fried cod and my friend had the wild sea bass.  I had added a side salad, which turned out to be completely unnecessary in terms of volume.  Both mains were served perfectly cooked.  The cod was served with crispy kale on a bed of garden peas with smoked lardons in a cream sauce.  The cod was perfectly cooked with soft creamy flakes of fish, the peas were filling and the sauce well-seasoned balancing the salty bacon.

The wild sea bass was served with leeds fondue, confit tomatoes, grilled spring onions, rösti potatoes and herb oil.   I can only report the silence that accompanied this dish being eaten as the reference for the dish.  It disappeared pretty quickly.

Presentation was simple but pretty.  A matching palate between the 2 plates, which quite appealed to me.

We skipped dessert because we were plenty full but had a decent strong coffee before heading out.  The bill was £88 including service.  Venue photos were provided by Riddle and Finn's (because mine were awful!).

It was an absolute surprise to be welcomed into a busy restaurant and have the staff spend time understanding and helping me order.  I felt safe and confident which made the experience of eating at Riddle and Finn's so much more enjoyable. 

Sunday 13 October 2013

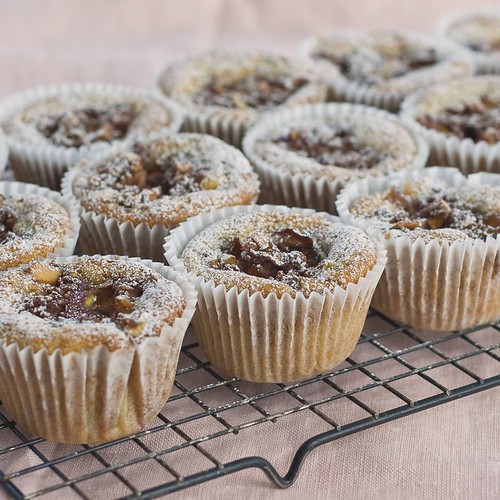
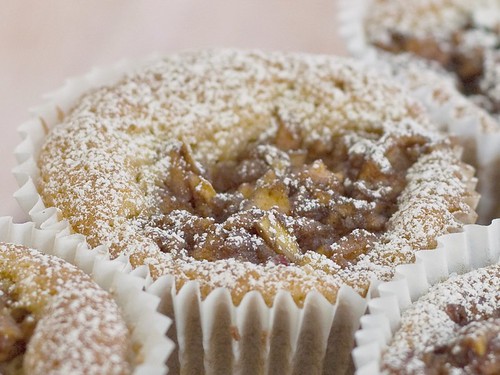
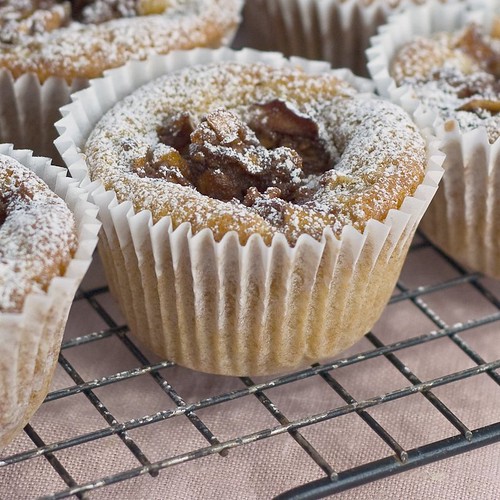
apple cinnamon cup cakes, gluten free

I have just upped sticks and moved north away from family and friends to study.  In doing so, I have left behind the family home and swapped my shiny new (and almost perfect) kitchen for a rented and shared 2 bed back-to-back terrace with a 9'x5' kitchen.  Gone too are almost all my cookbooks, baking equipment and ingredients.  I have kept what I hoped was the right few bits, the bare minimum of working. multi-purpose items.  So far, I am not impressed with my selection!
On this damp, grey, very autumnal day I have just been exploring the 7 miles of walking tracks and trails that pass my front door. In one direction, a woodland trail to the city centre, my daily walk to uni. In the other, parkland and trails head north out of the city to the moors and farmland beyond.  Perfect for walking, running and lazing (come next summer).
Basking in a warm glow of self-congratulatory praise on this choice of location, I pulled out my baking kit with an urge to bake apple cake.   My pleasure at my selection of 'essential' items is not so warm.  But I have managed to knock these up after a quick trip to Waitrose (finally, one of those within walking distance too!).
apple cinnamon cupcakes

These are super easy to make.  I used the blend of flour in the recipe simply because I have run out of rice flour, this blend does taste very nice but can equally be made with 110g each of rice flour + 110g buckwheat flour or 110g sorghum flour or 110g millet flour, or even another 110g rice flour - though this may be slightly gritty.  If you want to make these with wheat flour, use 220g Self Raising wheat flour with an additional 1.5tsp baking powder, and omit the xanthan gum.
The recipe made 18 cupcakes.

apple cinnamon cupcake 1

Ingredients
  • 300g apples (either dessert or cooking apples are fine)
  • 1.5 tsp ground cinnamon
  • 80g dark muscavado sugar
  • 120g rice flour
  • 35g millet flour
  • 35g sorghum flour
  • 35g buckwheat flour
  • 4.5 tsp baking powder
  • 0.5 tsp xanthan gum
  • 180g soft butter
  • 180g light muscavado sugar
  • 3 large eggs 
  • 1 tsp vanilla extract
  1. Line muffin tins with cup cake liners and preheat the oven (fan) to 165°C.
  2. Core and grate the apples (don't bother to peel them unless you really want to).
  3. Mix the sugar and cinnamon together in a medium sized bowl then add the apple and combine thoroughly, before setting aside.
  4. Sieve all the dry flour ingredients together and set aside.
  5. Beat the butter and sugar together using a hand or stand mixer until they are soft, pale and creamy.
  6. Add the vanilla extract and beat to blend thoroughly.
  7. Add the eggs, one at a time, beating thoroughly before adding the next one.  If the mix begins to curdle add a tablespoon of the flour mix and beat again.
  8. Now add the flour mix to the creamed mix and beat again until just combined.
  9. Put a spoonful of cake batter into each cupcake liner spread and levelling the mix across the base of each liner, which should be just less than half full (I found a heaped dessertspoon worked for me).
  10. Give the apple and sugar mix a good stir to mix the juices back in, then grab a teaspoon and put a heaped spoonful of mix on top of the cake batter in each liner.
  11. Bake in the preheated oven for 15 mins, then rotate the tray(s) and bake for a further 5 minutes before removing from the oven.
  12. Leave the cupcakes to cool for 5-10 minutes before removing from the trays and placing on a cooling rack until cold.
  13. Dust with icing sugar once cold.
  14. These cupcakes can be stored in the fridge for up to 3 days but can't be frozen (due to the fresh fruit).
apple cinnamon cupcake 2

    Tuesday 30 April 2013

    Pizza Express, at last!

    The announcement by Pizza Express that they were launching a gluten free menu caused much excitement in our house, so launch day saw us making an inpromptu visit there, foregoing our planned movie afternoon for a taste of proper pizza. 

    The staff in out local branch in Hastings were genuinely delighted to be selling gluten free pizzas on their launch day and seemed to know their stuff about the options available.  There was a bit of a hunt to locate the delivery of gluten free lager, but the wait was worth it, a very light and refreshing drink, perfect with (and before) pizza.   The gluten free pizzas are served on black boards which helps waiting staff identify them and will no doubt be really useful for busy evening and weekend visits.  
    All the standard (Romana) pizzas are available on the bespoke gluten free bases.  There are a few topping elements that are gluten-containing (more on that below) which would rule out a couple of the options, but you can make substutitions to get a pizza you can eat. 

    I ordered a Cappriciosa. I can't eat tomato so had an extra smear of garlic butter on the base and omitted the tomatoes from the toppings.  The base was crisp and light, the toppings fresh and the egg had a perfect runny yolk to dip the crust into. It was, I hate to say, better than my home made version!
    My daughter had an American which is a Margarita with pepperoni.  The bases - like so many gluten free breads - are slightly sweet.  This was more prominent with a tomato topping, leading my daughter to say that she preferred my, more savoury, tomato-free pizza.  


    The product developers have done a pretty good job.   They have developed a few bespoke gluten free items for the menu so it is possible to eat a 3 course meal there.  We did feel that they have missed a trick in not putting gluten free garlic bread on the menu using the same gf pizza base but hopefully this will follow before too long.  

    I think much has already been made of the fact that Pizza Express are only using gluten free flour to dust their bases in the restaurants, to avoid airborn contamination.  I am a bit confused as to how they mix their regular wheat bases, which I thought were made in-house, but judging by the attention to detail, I trust they have this covered.

    A visit to Pizza Express still needs a bit of homework before you go.  The list of gluten-containing products and ingredients is only available on the website so you need to read this in advance, or hope your phone gets a signal once you are there.  It really needs to be printed on the menu.  
    There are lots of items on the menu that are, or rather could be, gluten free by the omission of wafers or dough sticks.  This could be more clearly marked too as that would give an even wider choice. 
    I tweeted @pizzaexpress before we went to get the base ingredients (maize starch, modified tapioca starch, rice flour and potato protein).  It would also be really helpful if Pizza Express could list all product ingredients on their website rather than just a table of selected allergens. This table has not yet been updated to reflect the new menu which is a bit confusing too.

    These niggles aside, it was so refreshing to be able to order off a standard menu (and use a discount code!) to get really tasty gluten free and safe food in a comfortable and welcoming environment.  Next time - and there will definitely be a next time - we will leave enough room to try the gluten free chocolate brownie!


    Saturday 28 August 2010

    Chocolate Peanut Butter Ice cream & Daring Baker's Baked Alaska


    The August 2010 Daring Bakers’ challenge was hosted by Elissa of 17 and Baking. For the first time, The Daring Bakers partnered with Sugar High Fridays for a co-event and Elissa was the gracious hostess of both. Using the theme of beurre noisette, or browned butter, Elissa chose to challenge Daring Bakers to make a pound cake to be used in either a Baked Alaska or in Ice Cream Petit Fours. The sources for Elissa’s challenge were Gourmet magazine and David Lebovitz’s “The Perfect Scoop”.


    After quite a gap where I have struggled to find motivation, this month's daring baker challenge grabbed me and enticed me to try a recipe that has intrigued me since I was a little kid.  I think it was the most read recipe in one of my childhood cookbooks right at the back with surprisingly clean pages!  The recipe called for both shop bought ice cream and cake rather than making them from scratch.  I didn't even realise that you could make ice cream at home back then.  Although as a kid I read the recipe with lustful regularity, I never attempted to make it, it didn't make any sense - how on earth could you bake ice cream without it melting?  Madness!

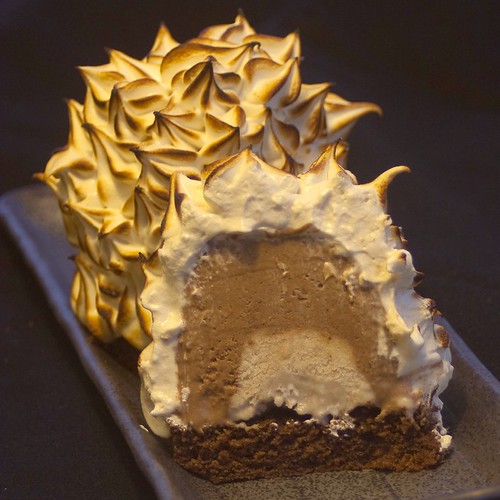
    halved baked alaska


    Anyway, yesterday, clad in shoes and a jumper for warmth for the first time this summer, the grey windy and rainy day provided a perfect backdrop for ice cream making and baking.  I was glad of the diversion from the miserable weather.  After much negotiation with the teen, the ice cream flavours were decided as i) chocolate and peanut butter & ii) banana.  The daring baker challenge called for us to make 2 types of ice cream from scratch along with a browned butter pound cake which would provide the base to build the baked alaska on.  I decided to make individual versions with the ice cream frozen into small French tumbler-style wine glasses lined with cling film.  Once the ice cream was un-molded and sat a'top the cake base, a simple meringue could be piped over the whole thing and then The molded ice cream is set upon a gluten free chocolate sponge base before being topped with a piped vanilla meringue which is baked or browned using a blow torch.  
    The meringue was a very simple recipe of 2 large egg whites and 100g castor sugar whisked together with a teaspoon of vanilla extract folded in at the end.  I piped this quickly using a star nozzle over the  ice cream bases and then blasted them with a blow torch - I am yet to dare to bake ice cream!
    I was persuaded to flavour the cake base with chocolate as well although for me, that has proved one step too far - it will some time before I eat chocolate cake again.

    pair baked alaska gr


    This dessert is rich beyond belief and even my baby French wine glasses proved way too big for the finished individual servings of baked alaska - if there is a next time, shot glasses will be used.  There was no need to serve a main course, this was a dessert-only dinner which had to be followed by a 5k run to settle my stomach!

    Much as I love a rich creamy ice cream (and for a simple flavour like vanilla I would definitely stick to the original recipe) for this combination of chocolate and peanut butter, I reduced the egg content of the recipe and used my own fall-back recipe for a (slightly) lighter ice cream.  This ice cream has been a regular for us all summer, we love the combination of salty crunchy peanut butter with a creamy sweet chocolate ice cream.  When I am making this for 'normal' consumption,  I would not add the peanut butter mix until the ice cream has almost finished churning so that the peanut butter ends up rippled through the ice cream rather than fully combined.  However for this baked alaska, I have fully mixed it in so that the ice cream will be consistently frozen throughout. 

    Chocolate & Peanut Butter Ice cream:

    • 100g 70% Belgian chocolate
    • 240ml / 1 cup double (heavy) cream
    • 3tbsp dutch processed cocoa powder
    • 240ml / 1 cup double cream 
    • 125g crunchy unsweetened peanut butter
    • a pinch of sea salt
    • 30g agave nectar or sweet freedom
    • 360ml / 1.5 cups whole milk
    • 140g or 2/3 cup white sugar
    • 3 large eggs
    • 1 tsp madagascan vanilla extract 
    1. Break up the chocolate and place in a microwaveable bowl with 1 cup double cream.  Heat on high for 45 seconds then stir until the chocolate melts into the cream.  Whisk in the cocoa powder and set aside.
    2. Mix the peanut butter with the second cup of double cream, the sea salt and the sweetener, set aside.
    3. In a heavy-bottomed pan, gently heat the milk and sugar stirring constantly until the sugar dissolves.  Remove from the heat as soon as this happens.
    4. Whisk the eggs in a large heatproof bowl.  Keep beating the eggs whilst pouring over the warm sweetened milk.  Beat until thoroughly combined, then pour the whole mixture back into the pan.
    5. Add the chocolate and cream mix to the pan and stir to combine.  Heat the whole chocolate custard mix very gently, stirring constantly until the custard is thick - do not let this boil, nor stop stirring until the custard is ready.  
    6. To check whether the custard is done, use your finger to draw a line through some cooked custard on the back of the spoon or spatula you are using to stir - when the bare line remains clear through the custard, then the mix is ready.  The custard will be thick and creamy but with a slightly jelly-like consistency, this is due to using whole eggs rather than simply egg yolks. 
    7. To cool the custard, you can simply place the whole pan in an ice bath or a sink or washing up bowl half-filled with cold water.  Make sure that you don't splash water into the custard as it cools - but don't put a lid on the pan as that will slow down the cooling process.  Change the water 2 or 3 times until the custard is at room temperature.  Now you can chill the custard in the fridge for an hour or so before freezing it.
    8. Once the custard is lightly chilled, add the peanut butter mix in large dollops but don't mix in too much (the churning will do this)  and now you can churn the mix as per your ice-cream maker's instructions.  If you don't have an ice-cream machine, you can decant the custard into a freezer-proof box and place in the freezer for 3 hours.  After three hours, take the box out and stir vigorously with a fork to break up the ice crystals.  Repeat this process hourly until the mixture is thick and creamy and too difficult to stir, at which point - if you are making baked alaska - you can decant the ice cream into the mold for freezing.

    Thursday 27 May 2010

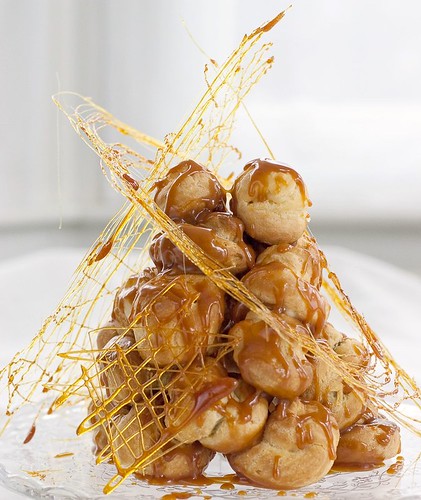
    gluten free pièce montée (Daring Bakers May 2010)


    The May 2010 Daring Bakers’ challenge was hosted by Cat of Little Miss Cupcake. Cat challenged everyone to make a piece montée, or croquembouche, based on recipes from Peter Kump’s Baking School in Manhattan and Nick Malgieri.

    So, this month's Daring Baker challenge was to make a pièce montée or croquembouche.  This is an epic 3-D dessert of French and Italian origin and are served as wedding and baptism cakes in France.
    A proper croquembouche (and mine is not quite) is a gravity defying pyramid of choux pastry puffs filled with sweet pastry cream and drizzled in caramel or maybe chocolate to provide some glue for construction purposes.  When I first figured out that the puffs were constructed around an inedible cone I was a bit disappointed, much the same as I when I (finally) realised that the 'celebration' cakes that languish in the windows of some bakeries are actually foam-filled moulds - Pah, humbug!
    I decided that I wanted my version to be all edible though as a result, it is slightly less impressive than the architectural cone or cocktail stick versions.

    piece montee full SM

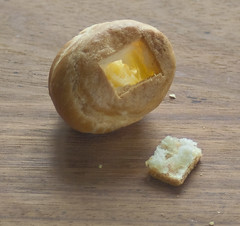
    The challenge recipe did not provide a gluten free alternative recipe so I used a recipe that I have been working on.

    unfilled choux puffs SM

    It isn't quite perfect or foolproof yet, so whilst the piped shapes puff up beautifully, they are not completely hollow inside.  Since I need to be able to fill the puffs with pastry cream, I cut a little hole out of the bottom of each puff and picked out the filling (which tends to sit on the bottom of the puff) then piped the filling in and replaced the bottom.


    I used the suggested recipes for the sweet pastry cream which were chocolate and vanilla so filled half the choux pastry balls with each variety.  I like the element of surprise with different fillings, though last time I made this dessert with a raspberry mousse filling which was lovely too.

    The most fun however, was in the decoration: spun sugar.  It was a damp day when I made the decoration which is not the best weather to be working with this delicate confection, you really need a dry tim environment, not Spring time (or any other time) in England.  I had to work fairly quickly to make the shapes then build the dessert and photograph it before the sugar softened.  I had no more than a couple of hours before the sugar began to soften and warp and the dessert began to gently collapse.  I got a bit carried away with the sugar spinning and made loads more than I needed.  Luckily the teen feels a need for empty calories (her definition) today so is crunching her way through it now!


    And there we have it, a really fun daring baker challenge. I will publish the recipe once I have put the finishing touches to this gluten-free choux pastry recipe, then you should have a go at making one too.

    Monday 24 May 2010

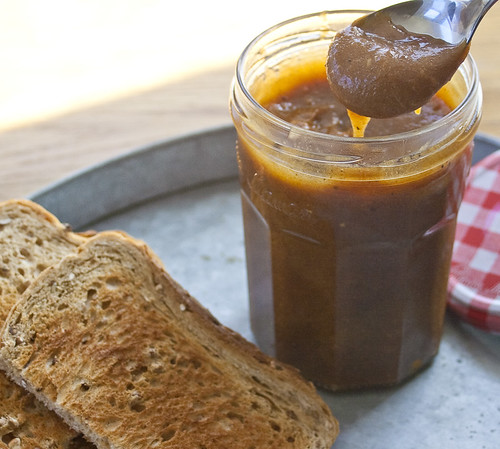
    gluten free ginger bread spread (speculoos a tartiner)


    I love speculoos biscuits. I mean, I really really love them! I used to get excited every time I discovered one of those slim, delicately spiced and caramelised biscuits nestled on the saucer almost hidden by my coffee cup. Until quite recently, though, I could only experience that thrill in Europe, not at home in the UK. Now times have changed and I could, if I wanted, buy bulk packs of speculoos in my local cash and carry (though in the UK they are just called caramelised biscuits, or some such). And now of course, even if I wanted to eat them, I couldn't, because they contain wheat.
    So, when food blogger and writer David Lebovitz wrote a post on speculoos spread I was envious and intrigued in equal measure. I read the post a couple of times and then carried on as normal ignoring the faint pangs of jealousy growing in the pit of my stomach. Ignoring, that is, until one morning a few days later when the sun was shining, my kitchen was quiet and I, for once in a very long time, actually felt like cooking.
    I searched around the internet until I found an ingredients list for the Lotus brand of 'Speculoos a Tartiner'. It made me laugh to read it - 57% crushed biscuits, sugar and vegetable oil to make a sweet smooth spread.  Duh, how obvious!


    Somewhere in the depths of my freezer I had a gluten free half batch of David Lebovitz's Chez Panisse Ginger Snap dough which needed to be eaten. I figured that I could mix up some speculoos spices, sprinkle over the dough, knead it in and bake the revised version. This might on be an unorthodox way to make Speculoos but in this case, imperfections don't matter as I am going to grind up them up anyway!
    One of my favourite memories of speculoos is the blend of spices mingling with the rich caramel flavour, so I decided that since I was already going to use my food processor to grind the biscuits, I might as well also make some caramel and grind that up to make caramel powder to use instead of sugar. So by 8.10 in the morning I was pouring a cup and a half of nut brown caramel onto my lined baking sheet to cool and preparing my spices to add to the defrosting log of ginger biscuit dough. One day, I may come back to this recipe again and create a proper gluten-free speculoos biscuit from scratch, but for now the buttery spicy dough of David's Chez Panisse ginger snap recipe is definitely delicious enough to satiate my immediate desire for this sweet creamy spicy spread.
    I added extra spices to the dough to give a touch of speculoos fragrance to the ginger and cinnamon of the cookie dough.  My mix contained white pepper, coriander, nutmeg, clove, cardamom seeds and anise but you can add or remove spices to suit your palate (or dig out your favourite speculoos recipe and bake those, of course!).   You can of course use shop-bought speculoos biscuits instead but if you do you might need to reduce the caramel powder to 90g as speculoos are a bit sweeter than the ginger biscuits I used.
    The spread will go through a strange "Oops, I've failed" phase as you mix it together.  In fact, it looked so odd that I didn't even bother taking photos of the method as I was so sure that it had gone wrong!  But I persevered and I was very glad I did as the crumbly lumpy mess slowly transformed into a smooth creamy spread. 
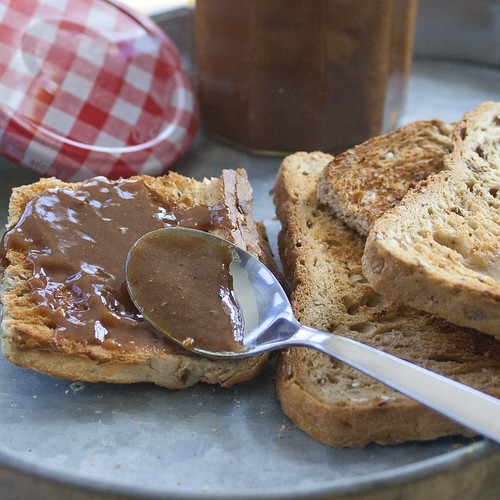
    There is, of course, a flaw in my plan: I have absolutely no idea what the original 'speculoos a tartiner' tastes like so I have nothing to compare my own version to.  I can however confirm that it is delicious: gently spicy, sweet and smooth but with a few crumbs for texture.  If you can resist tasting this for a day or two, you will be rewarded with an even richer, more rounded flavour.
    At the end of the day when the teen appeared, I mentioned that I had been messing around the kitchen but got no reaction (that's teenagers for you!) so I was amazed to discover the contents of the jar had almost disappeared the next morning ... I am now mixing up the next batch of cookies, I'll be making two jars this time!


    ginger bread spread recipe (to make 1 jar)

    ingredients:
    • 160g speculoos cookies or ginger snaps (as per details below) 
    • 120g ground caramel powder
    • 90g sunflower oil (or other neutral oil)
    • 60ml water
    • 15g nutritional soya lecithin (this will stop the spread separating once mixed & stored in the jar, it is great if you happen to have some but it is by no means essential)
    • 15ml lemon juice 
    • 1/4 tsp sea salt
    method - spread
    1. weigh 160g cookies into a food processor and process to a fine-ish powder, make sure there are no chunks left.
    2. add 120g powdered caramel (or 90g depending on your taste) and process again to combine.
    3. sprinkle in the lecithin (if using) and process again till fully combined.
    4. leave the processor mixing and add 1/4 tsp sea salt through the feeder tube.
    5. now pour in 90g oil and let the mix process to a rough puree
    6. pour in the lemon juice and don't panic when the mix turns into thick pasty lumps, it is OK (promise!)
    7. gradually tip in the water watching the mix as it becomes smooth and homogenous. stop adding water when you think you have the consistency you want - if you are using wheat-flour biscuits you may find you need slightly less water than with gluten free.
    8. stop the processor and taste the spread, add a little more lemon juice if you like.
    9. decant into a sterilised jar and store in the fridge for up to 2 weeks.
    speculoos biscuits:
    • a half batch (with extra spices) of David Lebovitz's chez panisse ginger snaps*
    • extra spices ground in coffee grinder: 3 white peppercorn, 1 black peppercorn 1 cardamom pod, 2 clove, a good grating of nutmeg, 1/2 star anise.
    • if you are making your own biscuits, add the extra spices at the same time as those in the recipe and follow the method as shown.
    • * to make the recipe gluten free replace the flour in the recipe with 260g rice flour PLUS 1/2 tsp xanthan gum or use your favourite gluten free mix.
    ingredients: caramel powder
    • 200g white sugar
    • 135g water
    method: caramel
    1. line a large heavy baking sheet with non-stick baking paper and set aside.
    2. take a large heavy based saucepan, sprinkle the sugar and water into the pan and it on a gentle heat without stirring.
    3. leave the pan on the heat allowing the sugar to dissolve and the syrup to boil gently.
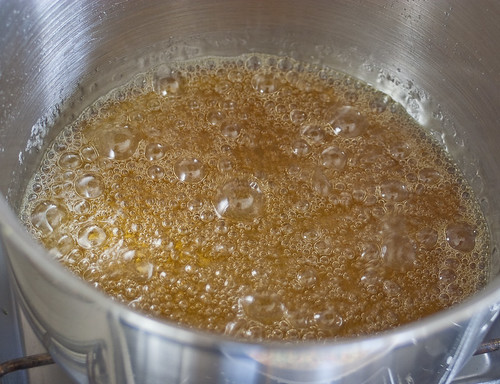
    4. keep an eye on the gently boiling syrup as it begins to colour, leaving it until it is a rich middling brown colour.
    5. pour the syrup onto a lined baking sheet and leave it to set.
    6. once the caramel is cold and set, break it up into small pieces and place them in a food processor.
    7. whizz until the caramel becomes a fine yellow powder, then tip out of the processor and store in an airtight jar.

    Tuesday 27 April 2010

    gluten free jam roly-poly, Daring Bakers April 2010

    The April 2010 Daring Bakers’ challenge was hosted by Esther of The Lilac Kitchen. She challenged everyone to make a traditional British pudding using, if possible, a very traditional British ingredient: suet. 

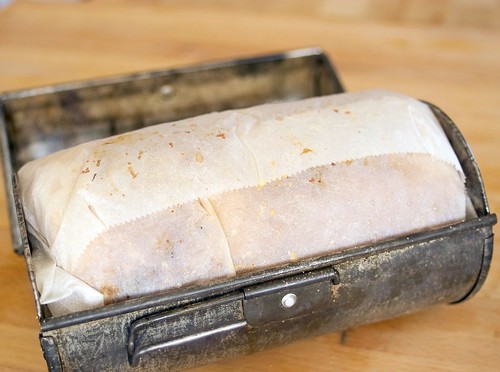
    It is unseasonably warm and blue outside so making such a traditional winter pudding seems a little anachronistic as I watch my courgette seedlings stretch up towards the sunlight, growing at least a centimetre a day.  The Daring Baker challenge for this month was to make a pudding of suet pastry, suet was the only required ingredient, so this could have been anything from steamed treacle pudding to a wintery steak and kidney savoury pudding.  I was at a loss for an idea of what to make until I found this, in a local junk/kitchenalia shop and when I found the original instructions inside, then my mind was made up - a jam roly poly in its' own proper tin.

    jam roly-poly -2

    Jam roly-poly is the epitome of proper English puddings, a suet pastry roll filled with sweet jam and cooked by a combination of steaming and baking, this pudding would be a familiar item to any school pupil educated in both state and private schools in the UK last century (and yes, of course that includes me!).
    I compared the recipe supplied with the tin to the version that appears in the 1923 copy of Mrs Beeton's Cookery that was given to my Grandmother in that year and they were almost identical, Mrs B suggested less baking powder and more salt so I tweaked the recipe a little to find some middle ground.
    A quick glance at more modern recipes revealed that very little else had changed, so I was ready to roll!  Apparently jam roly-poly is also known as Dead Man's Leg, which is slightly less appetising I think.  From that nick-name, the pudding then became known as Dead Man's Arm as house-wive's used the sleeves of their husband's old shirts to contain the pudding for baking, personally I think I will stick with roly-poly!

    jam roly-poly in tin

    Creating a gluten free version took a little thought.  I think that if I was really keen on this type of pudding, I would spend a little more time developing the pastry recipe.  In an ideal world, the pastry would be more flakey and layered than my version, which is slightly softer in crumb than I would aspire to.  The pastry for the pudding is not sweet, there is a touch of sugar to hint at the direction of the filling but the sweetness is supplied by the jam filling.

    whole jam roly-poly

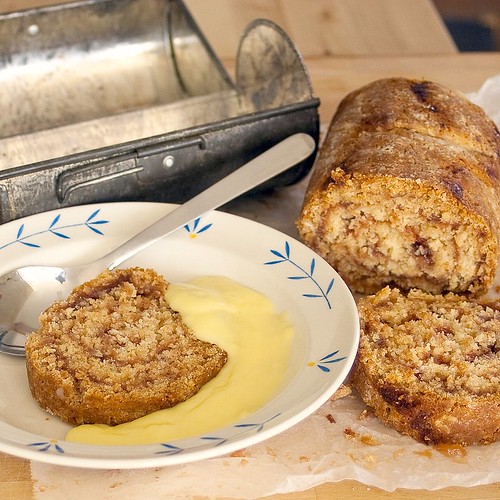
    I used, quite literally, the first jar of jam I could find in my store cupboard.  Now I have to own up that I have 3 batches of jam made last year, all of which were stashed in a cupboard quickly and label-less.  I know, big sin!  So when I grabbed the first jar, I was hoping for a thick strawberry jam with lots of fruit (and possibly a tad to much pectin) which would have remained in a thick layer between the rolls of the pudding.  Unfortunately I grasped a jar of quince jelly, sweet yet gently acidic but soft rather than sticky in texture.  The jam, as you can see in the picture, has soaked into the pastry a little, so the roll effect of the pastry is slightly less defined than I would like.  This doesn't detract from the taste at all, and with a slick of home made custard, this makes a delicious and filling winter pudding.  The pudding only takes about 15 minutes to put together, and an hour or so to cook, so it is not a difficult recipe to try (once the weather is cooler!).

    jam roly-poly, gluten-free pudding

    Jam Roly-Poly

    Ingredients
    • 95g rice flour
    • 50g corn flour
    • 50g tapioca starch
    • 1dsp arrowroot flour
    • 1dsp psyllium husks
    • 2 tsp baking powder
    • 1/2 tsp salt
    • 40g castor sugar
    • 100g gluten free (or butcher's) suet
    • 120ml milk
    • 150g jam
    Equipment
    • Mixing bowl
    • baking paper
    • foil, 
    • baking or roasting rack that fits inside a roasting tray
    Method
    1. Cut and grease a piece of baking paper approx 30cm square.
    2. Cut a piece of foil of a similar size (not needed if you have a roly poly tin).
    3. Preheat the oven to 200°C.
    4. Mix together all the ingredients except the jam to create a firm pastry.
    5. Tip the pastry out onto a floured surface and roll out to create a rectangle of pastry approx 15cm x 30cm (with the short side nearest you).
    6. Spread the surface of the pastry with all the jam.
    7. Roll up the pastry from the short end facing you, to create a roll 15cm by about 8cm deep.
    8. Using a couple of spatulas, lift the roll onto the greased baking paper and roll the baking paper loosely around the pudding (the pudding needs room to expand as it cooks).
    9. Fold the ends to create a tight seal, if you have a proper tin then pop the wrapped pudding into the tin and close.  If not then wrap the pudding loosely in a piece of foil, again sealing the ends tightly but leaving room for the pudding to expand.
    10. Place the wrapped pudding on a roasting rack in a roasting pan filled with water to a level just below the roasting rack, loosely cover the pan with foil and place in the pre-heated oven for 1 hour.
    11. When the pudding is cooked remove the pan from the oven, and unwrap the pudding carefully, beware of any build up of steam.
    12. Cut the pudding into slices about 2cm wide and serve each slice with custard, cream or ice cream.
    gluten-free jam roly-poly & custard